How to create Ubuntu 18.04 bootable flash drives properly using Windows
Whether you are using Windows 7, Windows 8 or Windows 10, creating a bootable Ubuntu flash drive is actually not that hard. But choosing the perfect tools for this job is really hard. There are lots of software that claim that they can create bootable Ubuntu flash drives. But to be honest not all of them work perfectly or at least they are not updated up to the date. I have tried many of them and failed and finally found that this one little software called Rufus works flawlessly. Although as a user you need to provide correct information to get a perfectly working bootable flash drive. This is specially true for Ubuntu 18.04 (Bionic Beaver). I will talk about the reasons in another post. Let's keep this post simple and focused. For a starter providing correct information to bootable drive creating softwares is a little bit confusing. I myself made many mistakes in doing so.
Here I will try to explain every step so that you don't make any mistake and understand properly about what you are doing. But at first we need to get this necessary softwares Rufus and Ubuntu 18.04 iso image. Ubuntu 18.04 iso image or file is the software from which we create bootable disks or bootable pendrives.
- Download Rufus from here. Visit the site https://rufus.akeo.ie/ and scroll down a little bit and you will find the download link.
- Next download Ubuntu from ubuntu.com ofcourse. Ubuntu is an open source operating system. Ubuntu is safe and secure and ubuntu is free. However, you can contribute to it's development by donating a little amount if you wish. But, if you do not want to contribute there is a link that says "Not now, take me to the download page" in near the bottom of the first download page. Here is the Ubuntu Desktop Download intro page. You should read through the page before clicking the download link to go next.
Download Links for necessary softwares:
- We will start creating our bootable flash drive by installing Rufus. To be exact Rufus works more like a portable software then an installed one. Double click on the exe file and give administrative permission to run the software. The Rufus window will open.

- The first option is the device option. Insert your free / formatted USB device aka flash drive into your PC / Laptop and select that flash drive here. Remember that all data in the flash drive will be lost. So, don't forget to backup your data first.
- The second option is very very important. Ubuntu installation process depends on it. It's about the partition type of the target system where you want to install Ubuntu 18.04 using this bootable flash drive. If that system is formatted with MBR (Master Boot Record) partition type it is safe to select "MBR partition scheme for BIOS or UFI". This will allow you to install Ubuntu 18.04 on a system with a legacy BIOS or with UEFI that has CSM (Compatibility Support Module) enabled.
Otherwise, just select "GPT partition scheme for UEFI". Most of the modern systems are GPT partitioned. - Next keep the File system and Cluster size default.
- New volume label generates automatically when you select the ISO Image below. As you can see on the above image that there is a disk icon there. This small icon is actually a button for selecting Ubuntu iso image. Click on it and select the Ubuntu iso Image file that we downloaded from ubuntu.com previously.
- Select the rest as shown in the above image. And finally click on the START button.
Let's examine the above Rufus window closely:
- In the next window Rufus asks permission to download two required files from the net.
Click on the YES button.

-
In the next screen Rufus asks about the mode in which the iso image should be written.
Select "Write in DD Image mode" to avoid boot issues.

-
When the green progress bar reaches to the right the bootable drive creation process finishes.
Now click on the CLOSE button. The bootable flash drive is ready.

Let's Create the Bootable Flash Drive for Ubuntu 18.04:
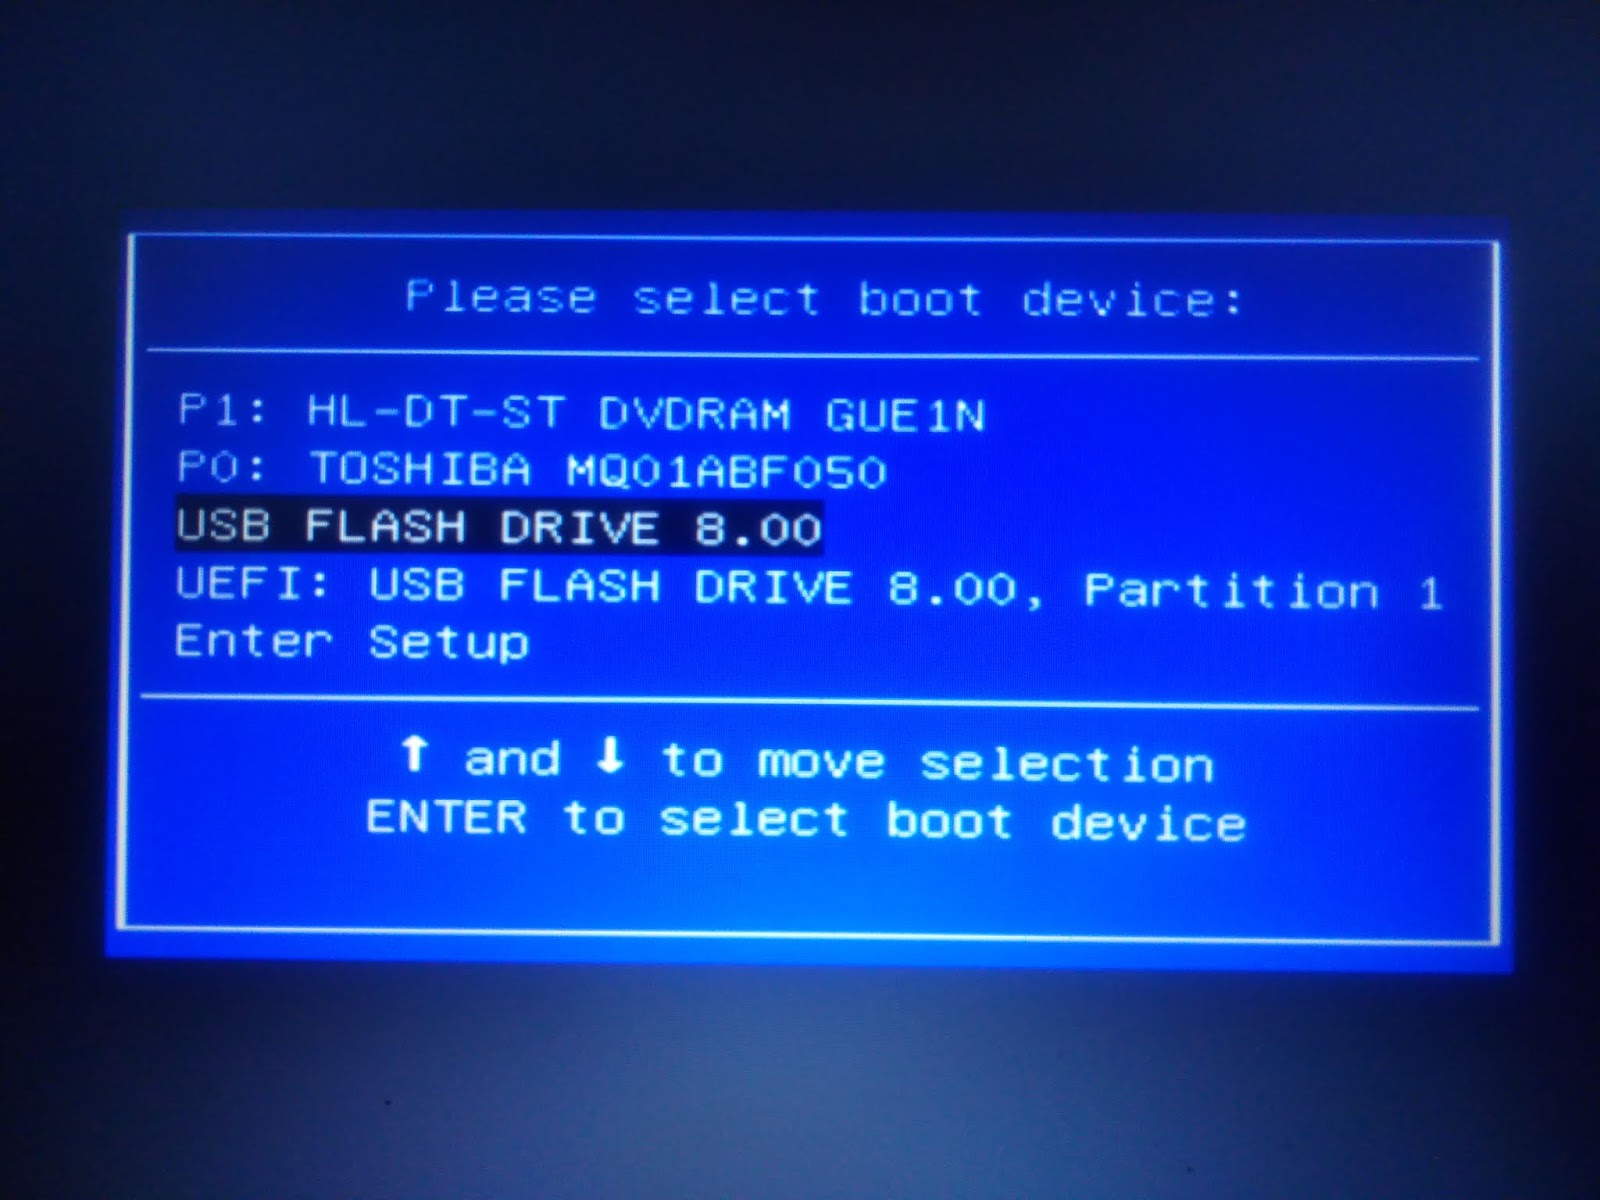
Last Words: The bootable flash drive that we get finally is a multiboot bootable device. It has both the BIOS and UEFI installation options. (I am guessing that like me you are also creating a bootable pen drive for am MBR partitioned system. If not, if you are creating a bootable drive for a GPT partitioned system things should be more easier for you.) So, booting up from this bootable drive is also a little bit tricky. I am going to write about booting up your system from the bootable drive in my next post here. But, for now, adios.
Comments
Post a Comment